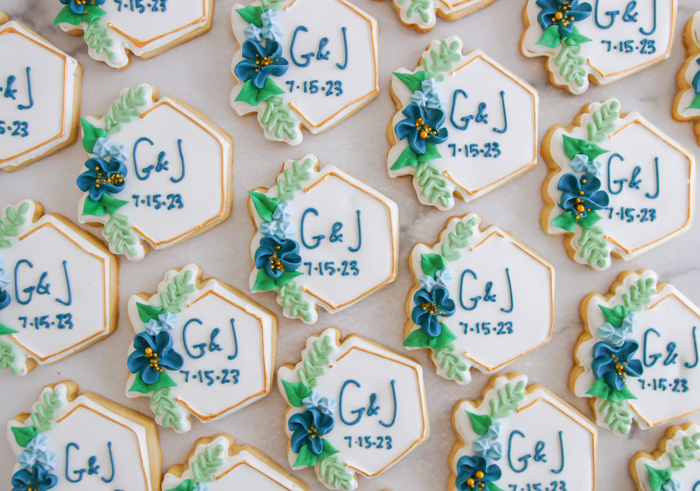
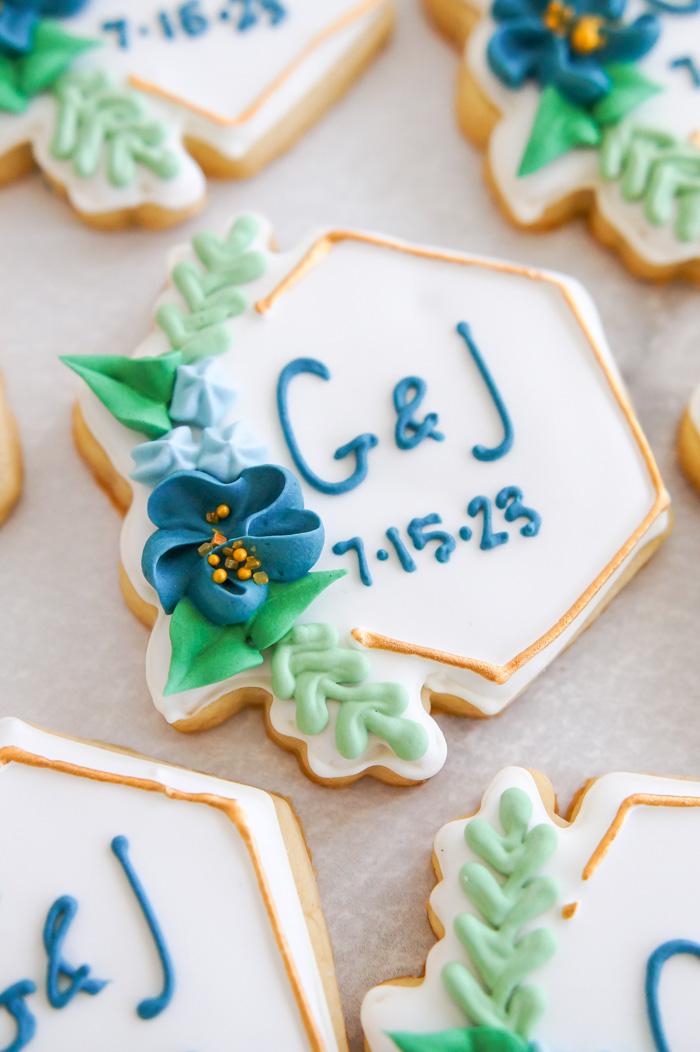
Ah! I cannot believe I haven't posted these! Last month, I made some floral monogram
wedding cookies for the sweetest couple.
No, I don't take cookie orders, but sometimes the stars align, and I'm able to make cookies for a special occasion.
I will show you how you can make wedding cookies at home for a wedding reception, bridal shower, or engagement party.
Can cookies be decorated ahead of time and frozen?
YES. Big yes. Cookies can be frozen at almost any stage of the process. Make the dough, wrap it, and freeze it. Roll the dough and cut out the shapes; freeze. Bake the cookies; freeze. And yes, decorate the cookies with royal icing, let dry, and freeze.
Details on freezing decorated cookies are here.
One more thought I had before making these cookies. The wedding colors were navy and gold. I envisioned navy cookies with white flowers and a pop of gold. Then, I asked myself...
Will navy blue cookies make teeth blue?
YES. Luckily, before I started decorating the cookies, I had a vision of the bride and groom...and all of the guests...with blue teeth.
The cookie background quickly changed to white with navy accents.
To make Navy and Gold Floral Monogram Wedding Cookies, you'll need:
Bake the
cut-out sugar cookies and let cool. Make royal icing. Divide and tint: white, navy blue, light blue, and two tones of green.
About NAVY food coloring:
Navy is a tricky color for icing. I like
Chefmaster Navy, which yields a warm navy shade. If you need a darker, cooler navy, add just a touch of black. Icing, especially dark shades of icing, will darken as it dries, so mix up your icing a little lighter than you want the end result.
Outline the cookie with a #2 tip in white; reserve some for later. Thin the rest of the white icing with water, a little at a time, until the icing is the consistency of glue. A ribbon of icing dropped back into the bowl should disappear in a count of "one-one-thousand, two-one-thousand, three-one-thousand."
Cover with a damp dishtowel and let rest for a few minutes. Stir gently with a silicone spatula and transfer to an icing bottle. Fill in the outline, using a toothpick to guide to edges and pop and large air bubbles.
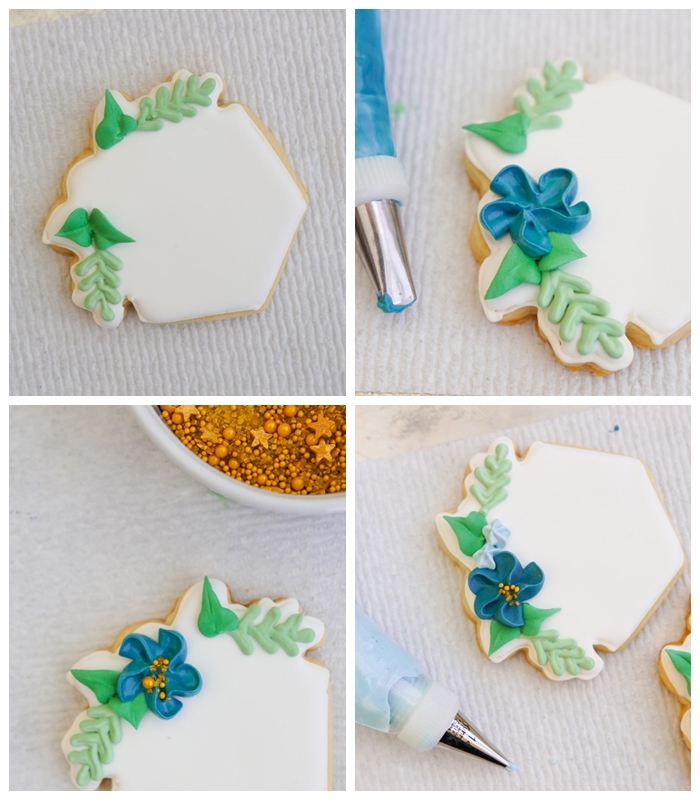
Let the cookies sit for about an hour. Meanwhile, put the two shades of green icing into piping bags. Fit the lighter green icing with a #2 tip and the darker green with a leaf tip.
Pipe leaves onto the cookie.
NOTE: It's always a good idea to practice piping leaves and flowers on a plate or piece of waxed paper before piping onto a cookie to get a feel for it.
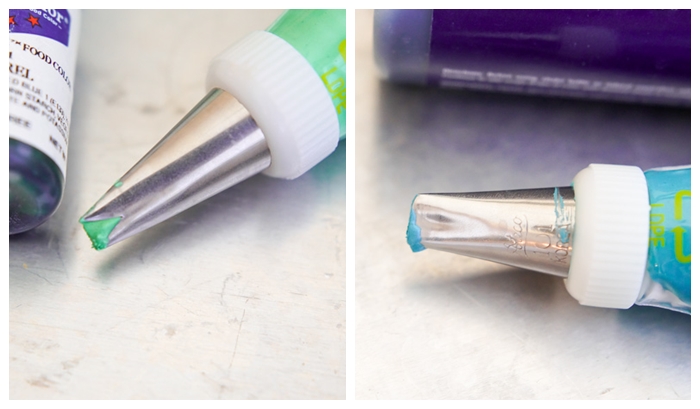
Fit a piping bag with a petal tip, such as
Ateco 101, and fill with navy icing. Pipe a large navy flower.
Add a pinch of gold sprinkles to the centers while the icing is still wet. Piping consistency icing dries quickly!
Add smaller flowers in the lighter blue color using a small star tip, such as a
Wilton 14.
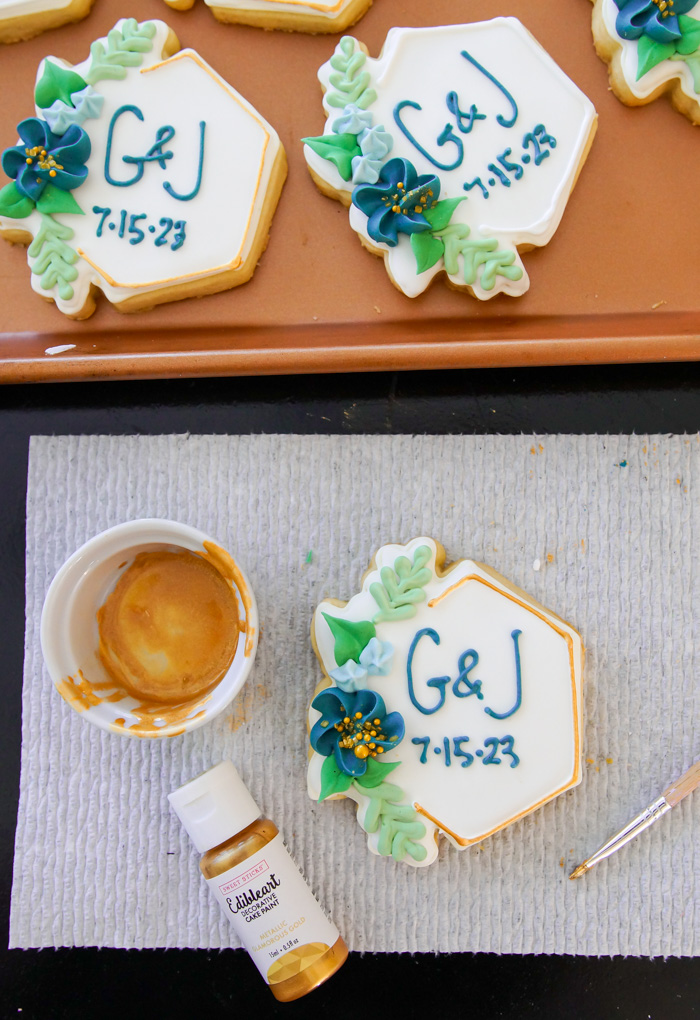
Switch the tip on the navy icing to a #1.5. Pipe cookie monogram and wedding date.
Use the remaining white icing to pipe a hexagon border.
Let the cookies dry uncovered for 6-8 hours or overnight.
The next day, use a food-only paintbrush to apply the
edible gold cookie paint. You can see in the photo what a difference that little pop of gold makes!
Happy Wedding, Johanna & Garrett!!! We loved celebrating with you!


